Sales Links
Sales links create controlled checkout paths for selected products.
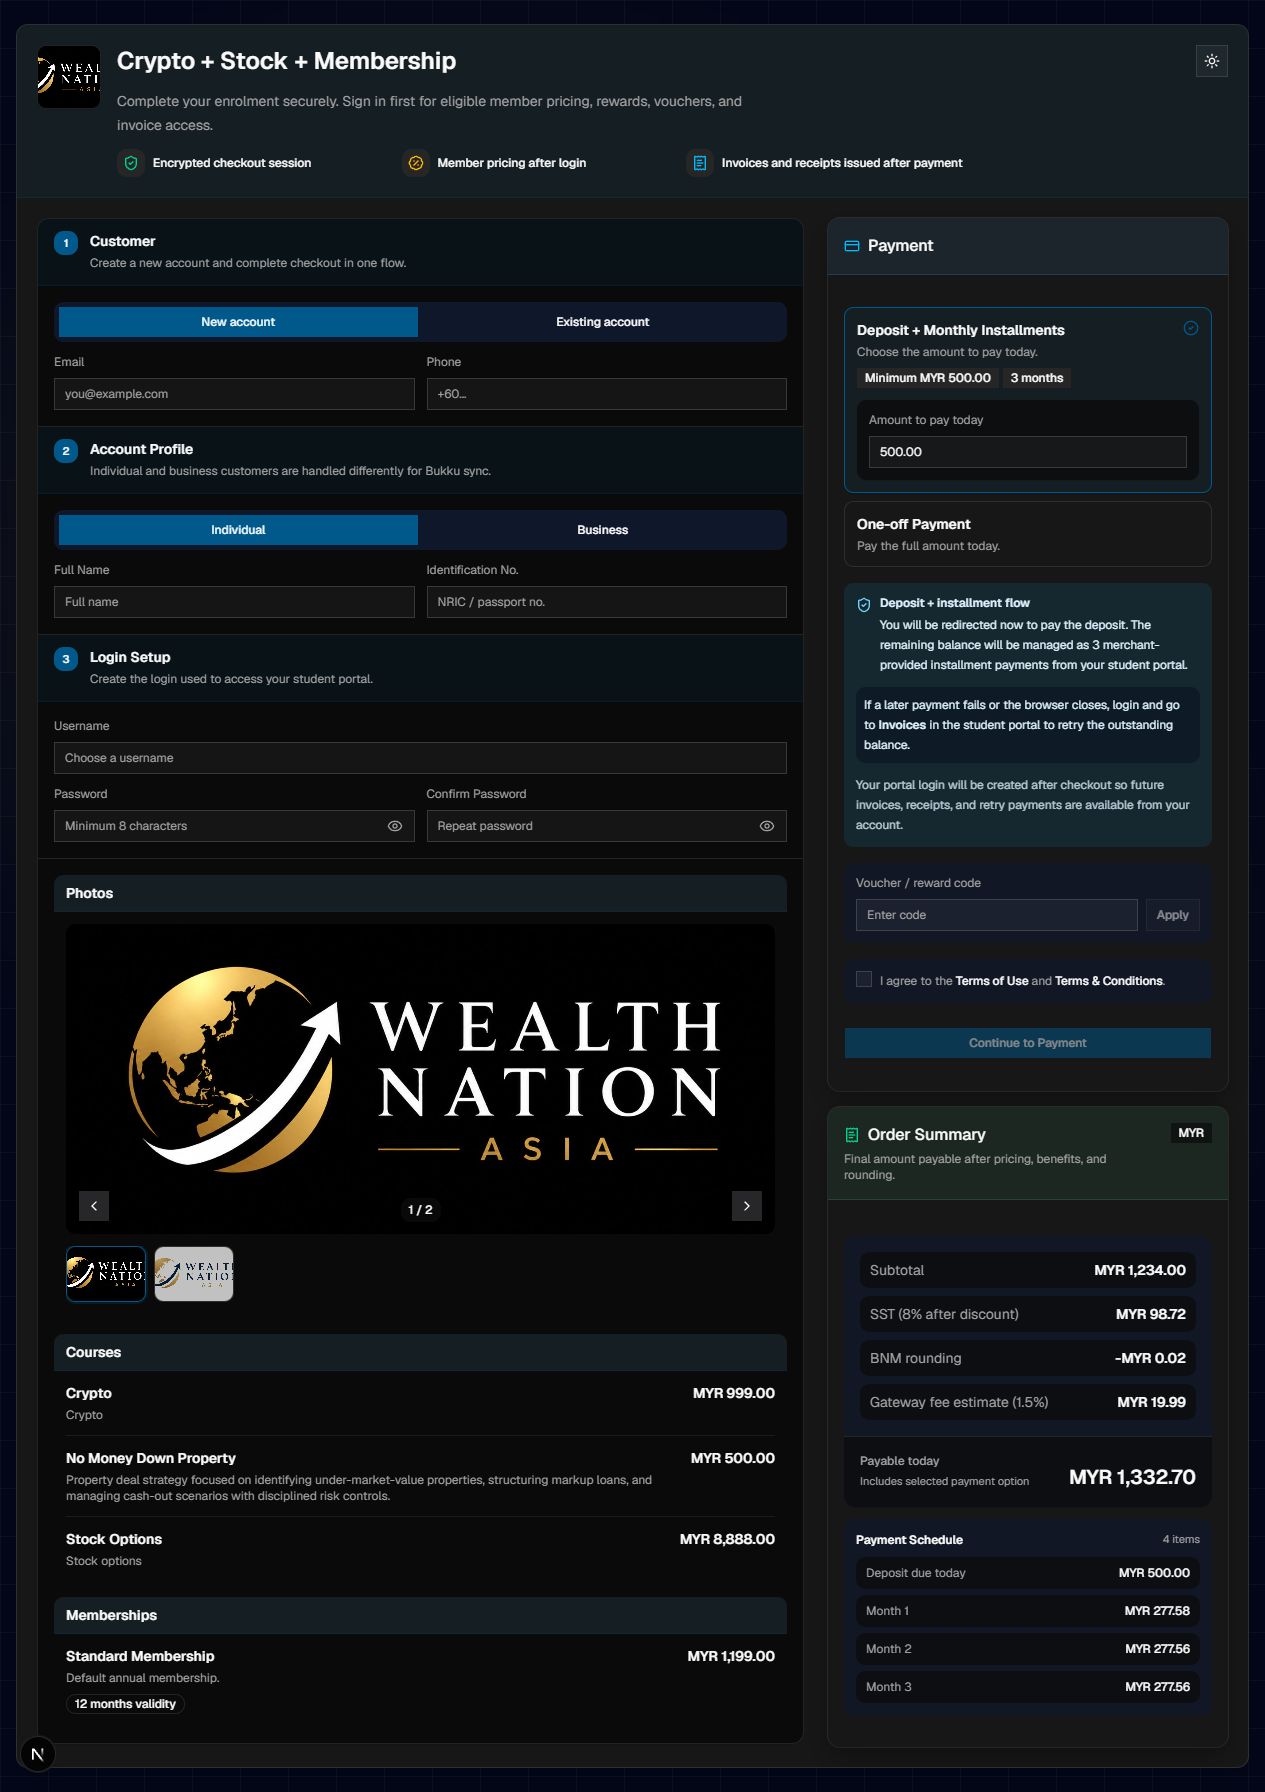
When a user opens a sales link, the checkout page should show the selected product, login or account setup options, payment selection, vouchers or rewards, and order summary.
How to Create a Sales Link
- Go to Marketing or Sales Links.
- Click Create Link.
- Enter the link name and basic details.
- Open the Products tab.
- Select the courses, bundles, memberships, or mentorships to include.
- If a bundle is selected, confirm the bundled products are disabled from duplicate selection.
- Review the calculated price.
- Turn on override price only when the link should use a special price.
- Add vouchers, rewards, or discount codes if they should be preselected.
- Save Draft or Publish when ready.
Product Selection
A sales link can include:
- Courses
- Bundles
- Memberships
- Mentorships
When a bundle is selected, the products included through that bundle should be disabled from direct selection to avoid double charging or confusing the summary.
Pricing Rules
Sales link pricing is determined in this order:
- Selected product prices are summed.
- Sales link override price is applied if active.
- Preselected voucher, reward, or discount values are applied.
- Manual checkout voucher, reward, or discount code may apply if allowed.
- SST and payment gateway settings are calculated according to finance settings.
Statuses
Use readable status labels with color icons:
| Status | Meaning |
|---|---|
| Draft | Link is being prepared |
| Published | Link can be used for checkout |
| Archived | Link is no longer actively used |
Audit Trail
Sales links should keep audit logs for:
- Product changes
- Price override changes
- Discount or reward preselection changes
- Status changes
- Publish and archive actions